
The Process:
Starting with a piece of champagne metallic cardstock, I blended inks in a diagonal from the bottom right corner toward the center. I used Distress Oxide inks in Antique Paper, Brushed Corduroy, and Vintage Photo.I used a set of nesting oval dies and cut the larger oval out and then with the next smaller I made a frame to fit inside the larger oval with a metallic copper cardstock. I treated this with an anti-static pad as I was planning to emboss on it.
Using the Misti I positioned Altenew's Enchanted Iris stamps on the frame and inked them with Versamark ink and used copper embossing powder to emboss on the metallic frame. I also embossed the butterfly from Altenew's Painted Butterflies in the top-right corner. To get that one leaf on the far left edge I had to mask off the stem and stamp it separately to be behind the stem.
Once the frame was embossed I placed a piece of white cardstock in the Misti in the same position and stamped the irises and leaves with Momento Tuxedo Black ink so I could color them with alcohol markers. I colored them with Altenew's Artist Markers in Lavender Fields, Deep Iris, Mango Smoothie, Frayed Leaf, Forrest Glade, and Emerald.
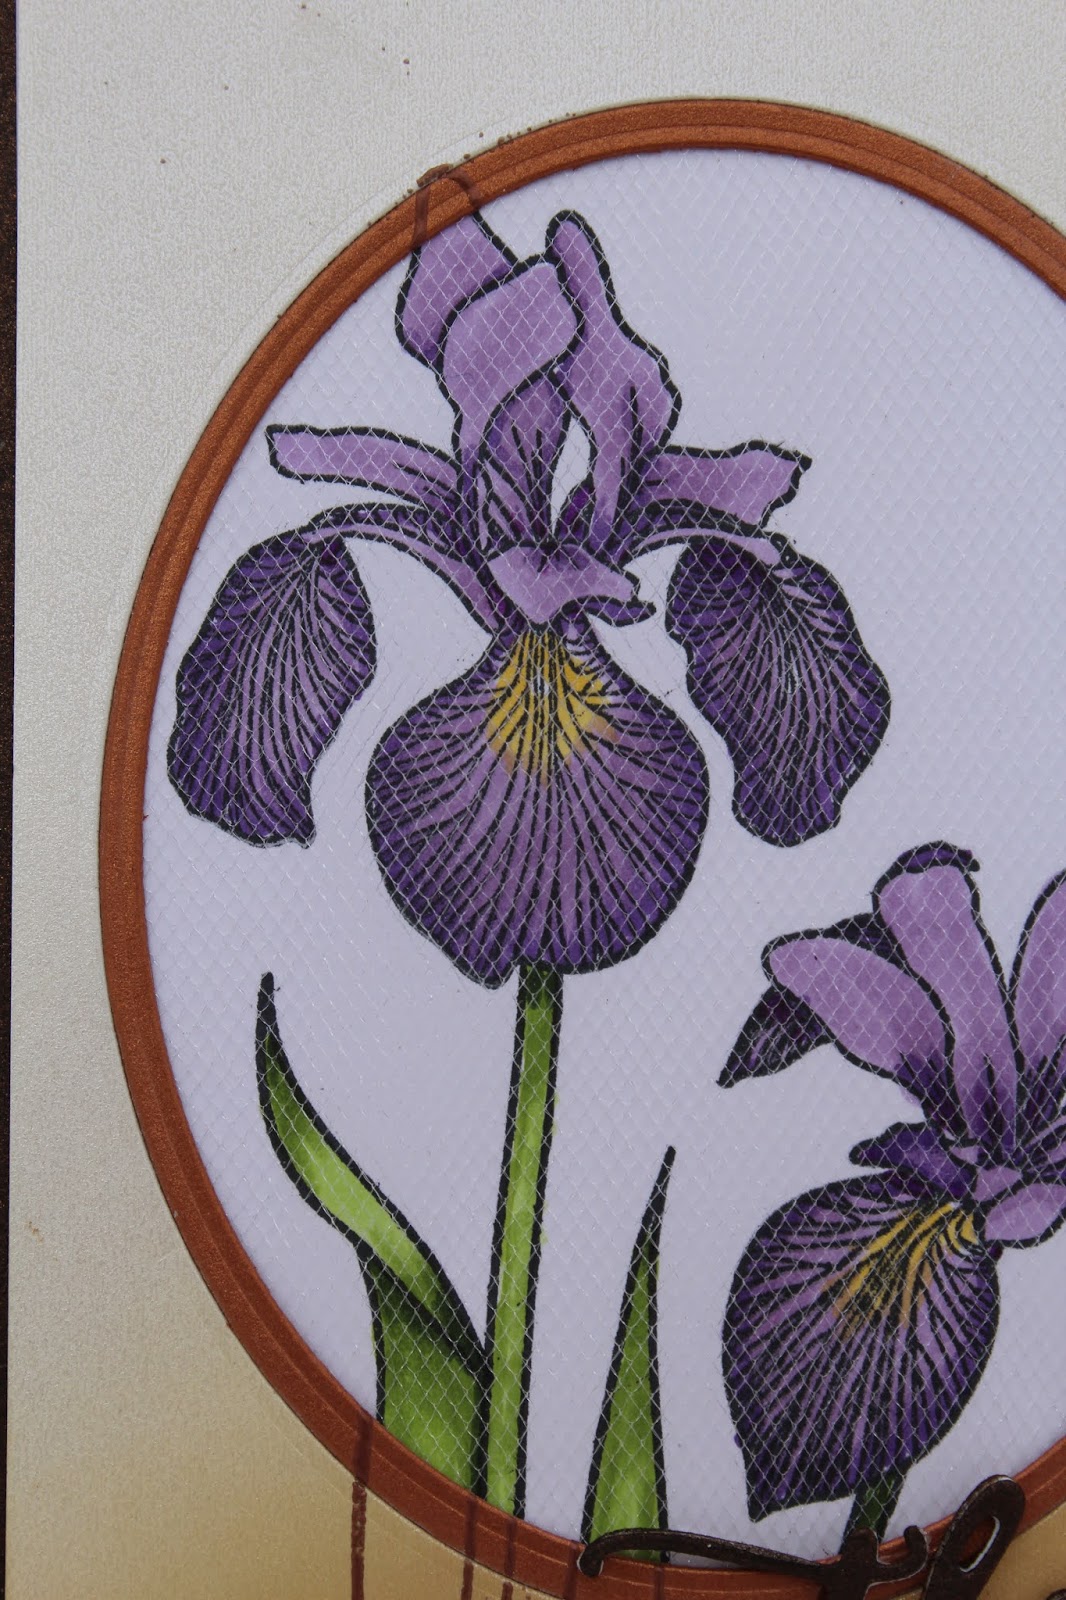 From the back side of the frame, I affixed a piece of shimmery tulle fabric over the oval hole in the
frame and positioned it over the colored image so that the embossed
lines of the frame lined up with the image. The tulle has a slight bit
of sparkle and gives the entire image a little shine.
From the back side of the frame, I affixed a piece of shimmery tulle fabric over the oval hole in the
frame and positioned it over the colored image so that the embossed
lines of the frame lined up with the image. The tulle has a slight bit
of sparkle and gives the entire image a little shine.I've used this instead of acetate for shaker cards and it doesn't give the glare that you sometimes get with acetate.
The sentiment is from the matching die set and was cut from bronze metallic cardstock and popped up by cutting it from foam also. The tip in the class for doing this was invaluable! The "for everything" is also from the Enchanted Iris set and was stamped with Versafine Black Onyx.

2 comments:
Wow! It's like a cross-stitch in a wooden embroidery frame. Thanks for sharing the details.
Wow!! I love how you made this card, partially coloured and that tulle!! AWESOME!!! I am glad you are stepping up your game!! Good job!
Thank you for entering your work to the AECP assignment gallery.
Post a Comment